Siding installation mistakes are one of the main ways water gets behind panels. They are errors in how the wall is wrapped, flashed and fastened. Seven account for most trouble: wrap, flashing, tight nails, hard-butted trim, low ground clearance, unsealed penetrations and a skipped final look. Each can be checked before the panels go on.
The short answer
- Siding sheds most rain, and the house wrap and flashing behind it catch the rest.
- Caulk alone is not flashing, since it dries and cracks within a few seasons of Texas sun.
- Vinyl nailed tight buckles in summer heat and opens a gap that wind can drive rain into.
- Keep the bottom course clear of soil, mulch and concrete, especially on swelling clay ground.
- Ask to see the wrap and flashing, or photos of them, before the panels cover the wall.
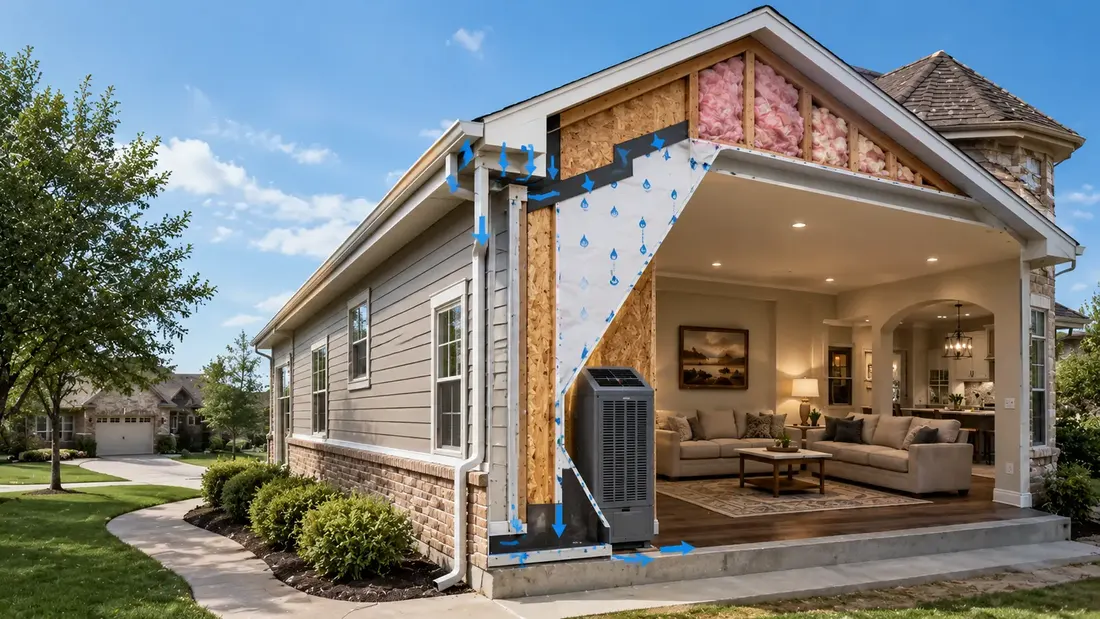
Siding does not make a wall waterproof. It sheds most of the rain, and the layers behind it catch the rest. Think of a wall as a stack: panel, wrap, sheathing, framing. When one layer is put on wrong, the next one has to save the day, and sometimes there is nothing left to do it.
How does water get behind siding?
It gets in at joints and openings, and from the ground up. Wind pushes rain sideways under panel edges, water runs down a window and into the wall, and soil splashes the bottom course. A good install gives every drop a path out. A bad one gives it a path in.
| Layer | Its job | What goes wrong |
|---|---|---|
| Siding panel | Sheds most rain and shades the wall | Nailed tight, cracked or butted hard to trim |
| House wrap | Catches water that gets past the panel | Laps in the wrong direction, gaps or tears |
| Flashing | Steers water out at windows, doors and roof edges | Missing, short or taped over wet surfaces |
| Sheathing | Holds the wall together | Soaked and softened by hidden leaks |
| Ground clearance | Keeps the bottom course dry | Soil, mulch or concrete against the panels |

Which siding installation mistakes let water in?
Seven mistakes cause most of the water trouble we see behind old siding. They are listed in the order a wall is built, from the layer closest to the studs to the last look at the finished job. Each one is quiet at first and costly later.
Mistake 1: Skipping or misplacing the house wrap
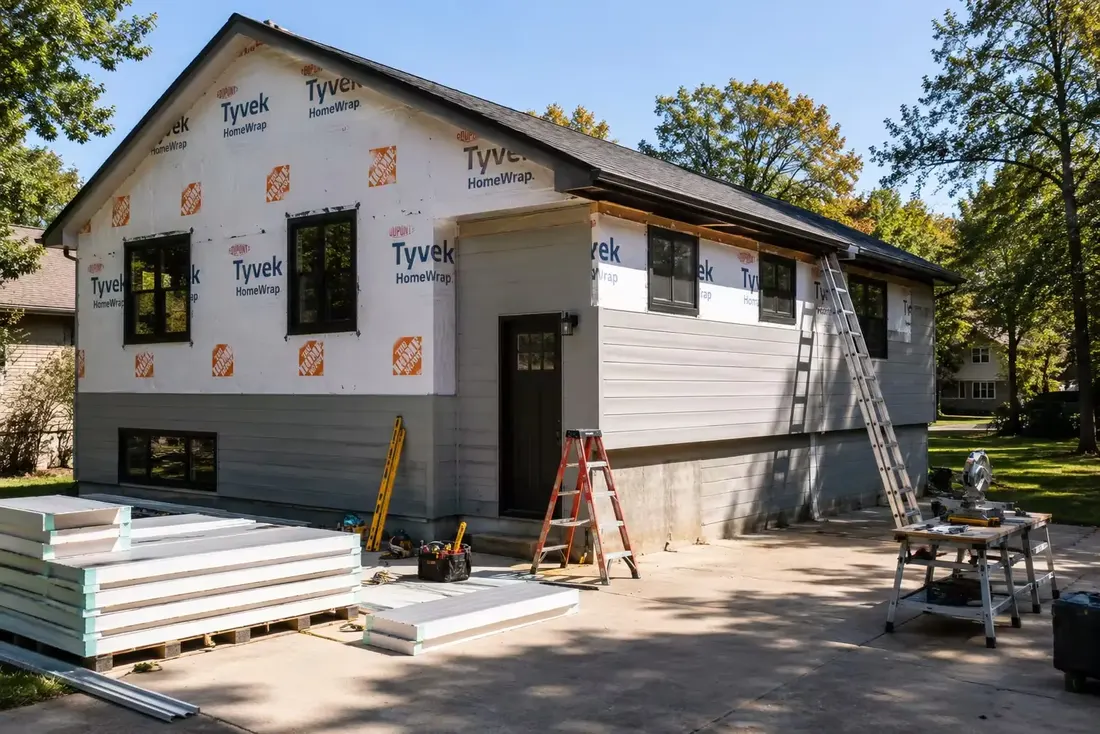
House wrap is the second line of defense. It has to be lapped like shingles, with each upper piece over the lower one, so water runs down and out. Wrap that is put on backward, torn, or left with open seams lets water slip behind it. Ask to see the wrap before the panels cover it.
Mistake 2: Poor flashing at windows and doors
Openings are where most leaks begin. Flashing at the sill, jambs and head must be fitted so water leaving the window runs out over the wrap, not in behind it. Caulk alone is not flashing. It dries, cracks and fails in a few seasons of Texas sun, and the wall is left unprotected.
Mistake 3: Nailing vinyl tight
Vinyl expands and contracts, so panels must slide on their nails. Panels nailed tight buckle in summer heat, and a buckled panel opens a gap at its edge. Wind then drives rain into that gap. A crew that rushes the fastening is the usual reason.
Mistake 4: Jamming panels against trim with no allowance
Panel ends need a small gap at the trim and corner posts so the material can move. Butt them tight and they push, bow and pull away from the channel. Fill the gap with the wrong sealant and the sealant fails. Good crews leave the gap, and finish it right.
Mistake 5: Leaving the siding too close to the ground
The bottom course needs clearance above soil, mulch and concrete. In Dallas and Frisco the clay under a lawn swells in wet seasons and shrinks in dry ones, so a gap that looked fine in August can close by spring. Soil piled against a panel keeps it wet, and splash from the ground does the rest.
Mistake 6: Not sealing penetrations
Every pipe, vent, light and hose bib passes through the wall. Each one needs flashing or a proper mounting block and the right sealant. A small gap around a light fixture can feed water into a wall for years before a stain shows. Walk around the finished house and look at each penetration.
Mistake 7: Skipping the final inspection
A walkthrough catches what the crew missed. Look at roof-to-wall junctions, gutter ends, corners and every opening. Ask the crew lead to explain what is behind each one. If you cannot see it, ask for photos from before the panels went on. We show you what we find while the wall is open.
How can you check the work before it is covered?
The best time to check is before the panels go up. Ask the contractor to let you see the wrap and flashing at the windows, or to send photos. Once the siding is on, the layers that matter are hidden. A contractor who welcomes the question is a good sign. One who dodges it is a warning.
- Is the wrap lapped like shingles, with upper pieces over lower ones?
- Do you see flashing at sills, jambs and heads, not just caulk?
- Are penetrations flashed or blocked, with no open holes?
- Is there clear space between the bottom course and the soil?
The Polymeric Exterior Products Association publishes an installation manual for vinyl siding, and a good crew follows the maker’s instructions. For what is at stake, the EPA’s mold page notes that the best way to control mold growth is to control moisture.
What if the work is already done and you suspect a problem?
Look for the signs and act early. Stains under windows, soft trim, buckled panels and musty rooms are the usual ones. Our post on spotting water damage behind siding walks through a check you can do yourself. It is easier to fix a small leak than a rotted wall.
For insulated panels, see insulated siding installation mistakes, which covers fastening, trim depth and the foam layer. American Eagle Builders has been a family business in Arlington since 1984. Our siding process includes house wrap and flashing at every opening, and a free in-home estimate is the place to ask about them.
Questions we get asked about this
Poor flashing and weather barrier work at windows, doors and other openings. Those are the places water enters most. Caulk alone does not replace flashing. A good installer fits flashing so water runs out over the wrap, and shows you the work before panels cover it.
Yes. Vinyl moves as temperatures change, so panels must slide on their nails. Nails driven tight pin the panel, and it buckles in the heat. The buckle opens a gap, and wind can drive rain through it. Fastening is easy to rush and hard to see afterward.
Not close enough to touch soil, mulch or concrete. The bottom course needs clearance so splashing and standing water stay off it. On clay soil that swells and shrinks, keep the grade sloping away from the house and the soil below the panel edge.
Look for buckled or wavy panels, gaps at trim, stains under windows, soft lower boards and musty rooms. Also look at penetrations and roof-to-wall junctions. If you suspect a problem, a contractor can open a small area to see the wrap and flashing.
Yes. American Eagle Builders is a remodeling company in Arlington, owned by one family and serving Dallas-Fort Worth since 1984. We look at what is behind your siding as far as we can at the estimate, and we show you what we find while the wall is open during a job.